


Webflow Interactions and Animations: Complete Guide (2026)
How Webflow Interactions work: trigger types (scroll, hover, click, page load), step-by-step setup, common use cases, GSAP integration, and troubleshooting when interactions don't fire.
Actionable insights to improve SEO, speed, and conversions
Connecting a custom domain to your Webflow site requires updating DNS records at your domain registrar (GoDaddy, Namecheap, Cloudflare, etc.) and adding the domain in your Webflow Site Settings. The full process takes about 15 minutes of work, plus 4-48 hours for DNS propagation.
This guide walks through every step with screenshots, registrar-specific instructions, and fixes for the most common errors.
Webflow requires three DNS records to connect a custom domain: two A records and one CNAME record. The A records (pointing to 75.2.70.75 and 99.83.190.102) handle requests to your root domain (yoursite.com). The CNAME record on the www subdomain (pointing to proxy-ssl.webflow.com) handles SSL certificate provisioning and secure routing through Webflow's edge network.
This specific configuration is required because Webflow uses a load-balanced infrastructure where the two A records provide failover if one server experiences issues, and the CNAME enables Webflow's automated Let's Encrypt SSL management.
DNS propagation for a Webflow custom domain typically takes 4-24 hours, with a maximum of 48 hours. Speed depends on:
You can check global propagation status using <a href="https://dnschecker.org" rel="noopener noreferrer">dnschecker.org</a> — enter your domain to see whether DNS servers around the world are returning the updated records.
The most common reasons a Webflow domain shows "Disconnected" or "Error":
75.2.70.75 and 99.83.190.102proxy-ssl.webflow.com (not proxy.webflow.com or webflow.com).Connecting your Webflow project to a custom domain (like www.yoursite.com) is a key part of the Webflow domain setup process. If you're wondering how to connect domain to Webflow, this step gives your website a professional look and improves branding and SEO.
www.yourdomain.com) for best coverage.Next, you’ll need to log in to your domain registrar (where you purchased your domain) and update your DNS records by following the Webflow DNS settings. You’ll need to add two types of records.
A Records (for root domain)
CNAME Record (for www subdomain)
Back in Webflow
Webflow automatically provides free SSL certificates. Ensure Webflow SSL is enabled.
Congratulations! Your Webflow site is now live on your custom domain.
Recommended To Read: The Ultimate Guide to Setting up 301 Redirect in Webflow
Changing your Webflow domain name is simple and can be done in a few steps. Whether you're switching to a new brand name or updating your domain for SEO or marketing purposes, here's how to do it:
Tip: Always make sure to set up 301 redirects to avoid broken links and maintain your SEO rankings during the domain transition.
In this step-by-step guide, you learned how to connect a custom domain to your Webflow website. Webflow connect custom domain functionality is essential for establishing brand authority, boosting SEO, and creating a seamless user experience. The process may sound technical at first, but Webflow makes it easy to manage setups like Webflow multiple domains with built-in tools, clear DNS instructions, and real-time domain verification.
Whether you're launching a business, portfolio, or SaaS product, having a custom domain sets the foundation for digital credibility.
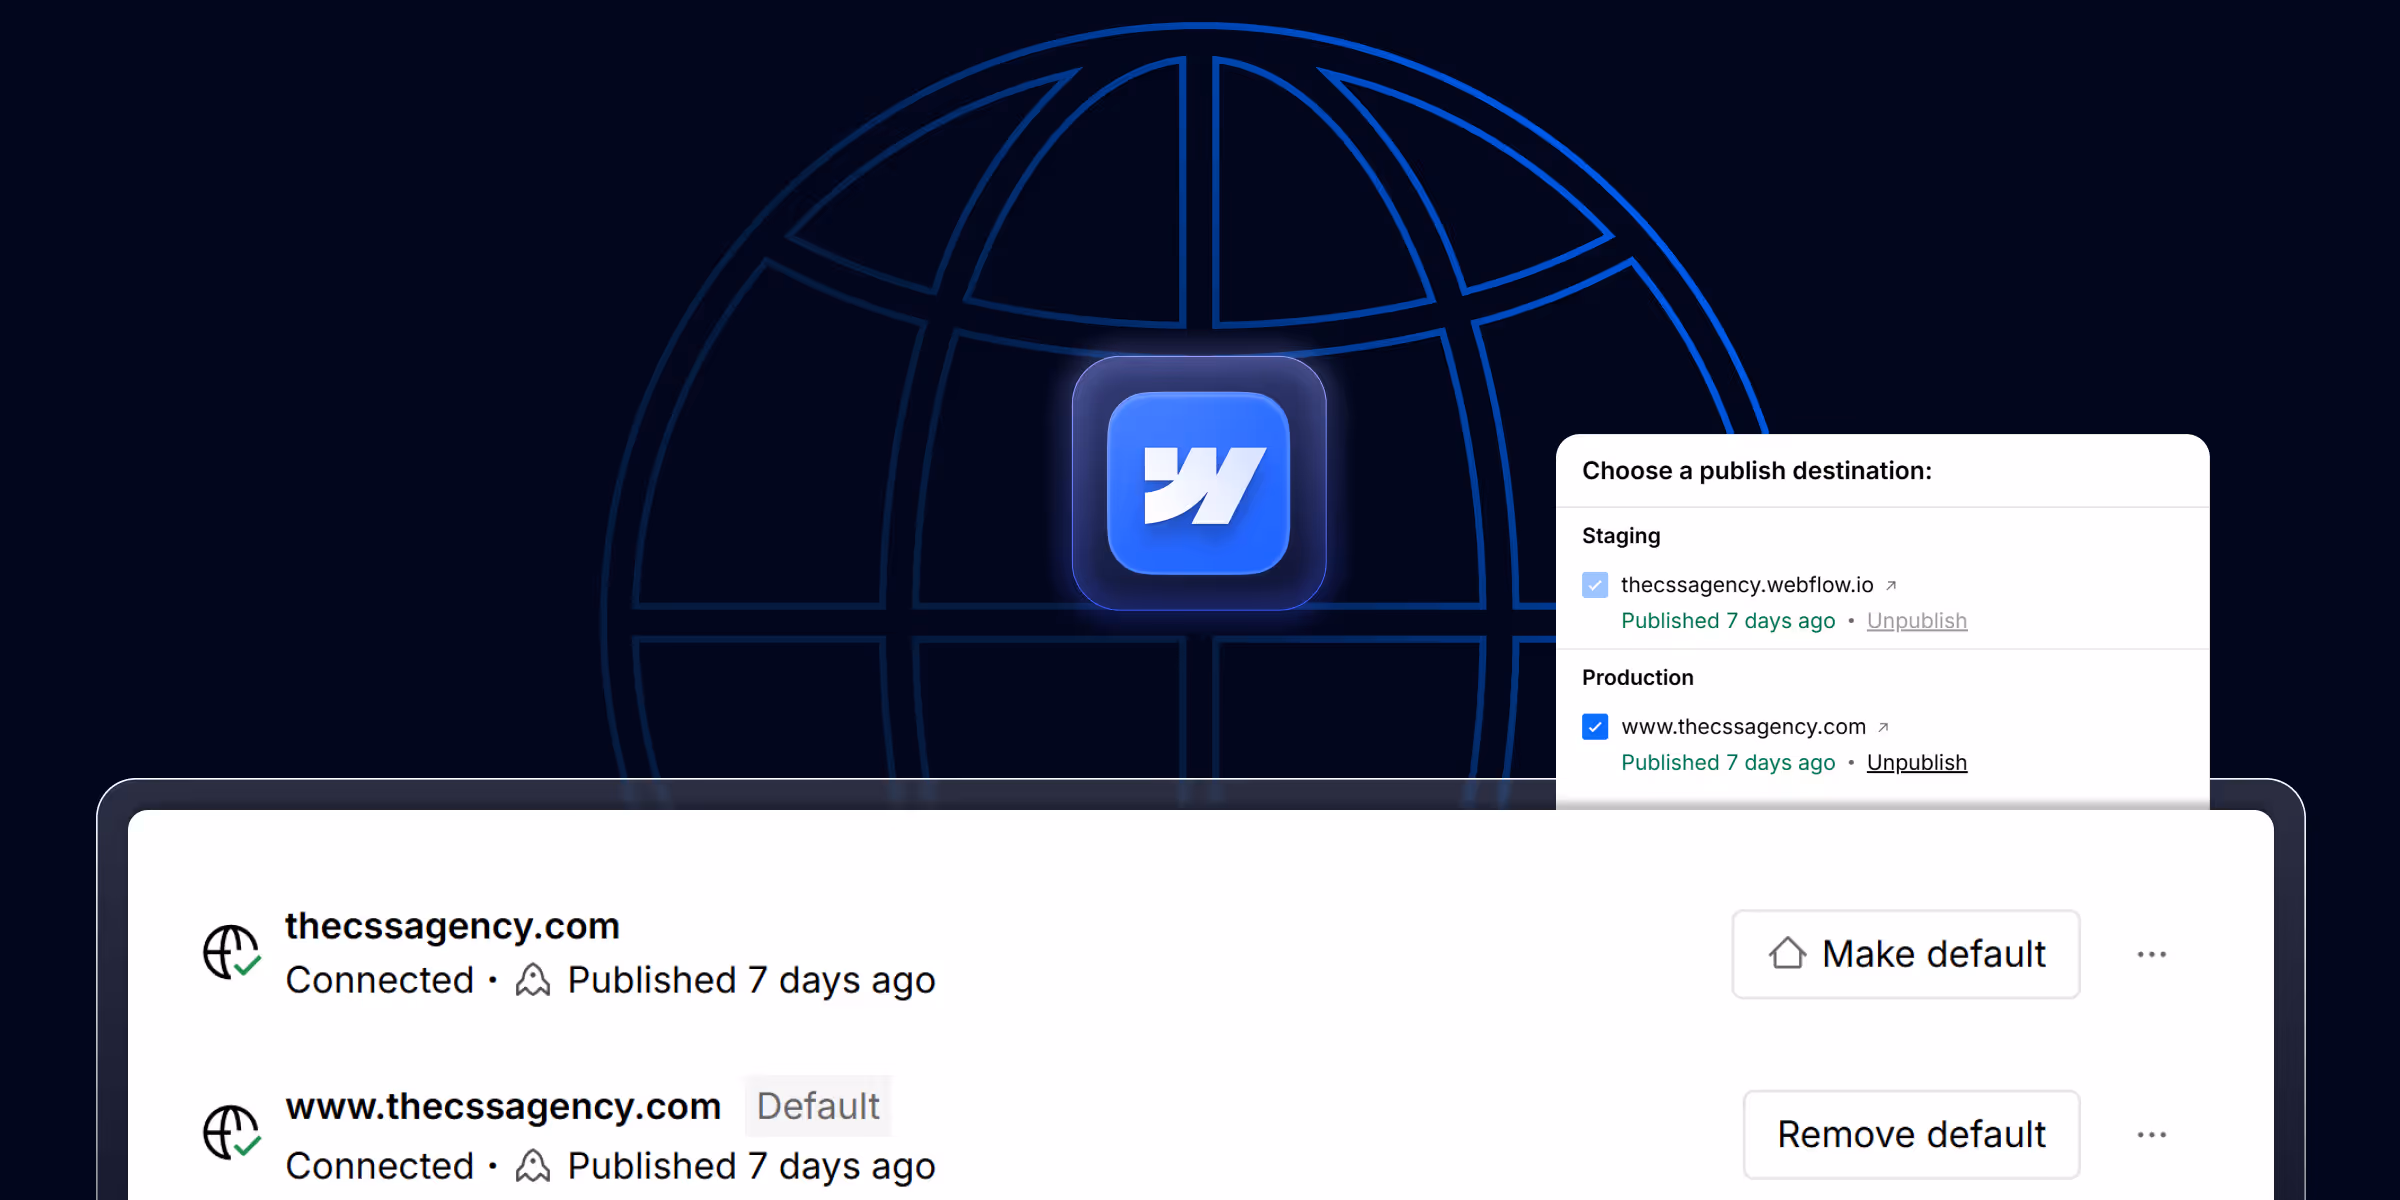
Yes, you can build and publish your site on Webflow’s free staging domain (yourproject.webflow.io). However, to connect a custom domain, you’ll need to upgrade to a Webflow Site Plan.
It can take anywhere from a few minutes to 48 hours, depending on your domain registrar and internet service provider.
No. Webflow includes fast, global hosting as part of its Site Plans. When you connect your domain, your website is automatically hosted on Webflow’s servers with built-in SSL, CDN, and backups.
Yes. You can add multiple custom domains (e.g., .com, .net, .org) and redirect them all to your primary domain in Webflow’s settings for better SEO and consistency.
Webflow requires two A records pointing to 75.2.70.75 and 99.83.190.102 (for the root domain), plus a CNAME record on the "www" subdomain pointing to proxy-ssl.webflow.com. These are added in your domain registrar's DNS management panel.
The most common reasons are: (1) DNS records not yet propagated (wait up to 48 hours), (2) incorrect IP addresses in A records, (3) CNAME pointing to wrong target, (4) conflicting old DNS records from previous hosting still active. Use a tool like <a href="https://dnschecker.org" rel="noopener noreferrer">dnschecker.org</a> to verify your records globally.
Yes. Add the subdomain in Webflow Site Settings → Publishing → Add Custom Domain. In your DNS settings, create a CNAME record where Host = "blog" (or your subdomain prefix) and Value = proxy-ssl.webflow.com.


Viken Patel has 17+ years of experience working with websites. He is passionate about building website that converts. His marketing background helps him build the sales driven websites.
How Webflow Interactions work: trigger types (scroll, hover, click, page load), step-by-step setup, common use cases, GSAP integration, and troubleshooting when interactions don't fire.

Learn how to build a high-impact B2B SaaS SEO strategy that attracts qualified leads, boosts rankings, and drives consistent revenue. Step-by-step framework with real growth tactics
A Webflow Premium Partner is an agency at the top tier of Webflow's official partner program.
Quick Turnaround. No Contracts. Cancel Anytime. Book a 30 minutes consulting call with our expert.