


Webflow Interactions and Animations: Complete Guide (2026)
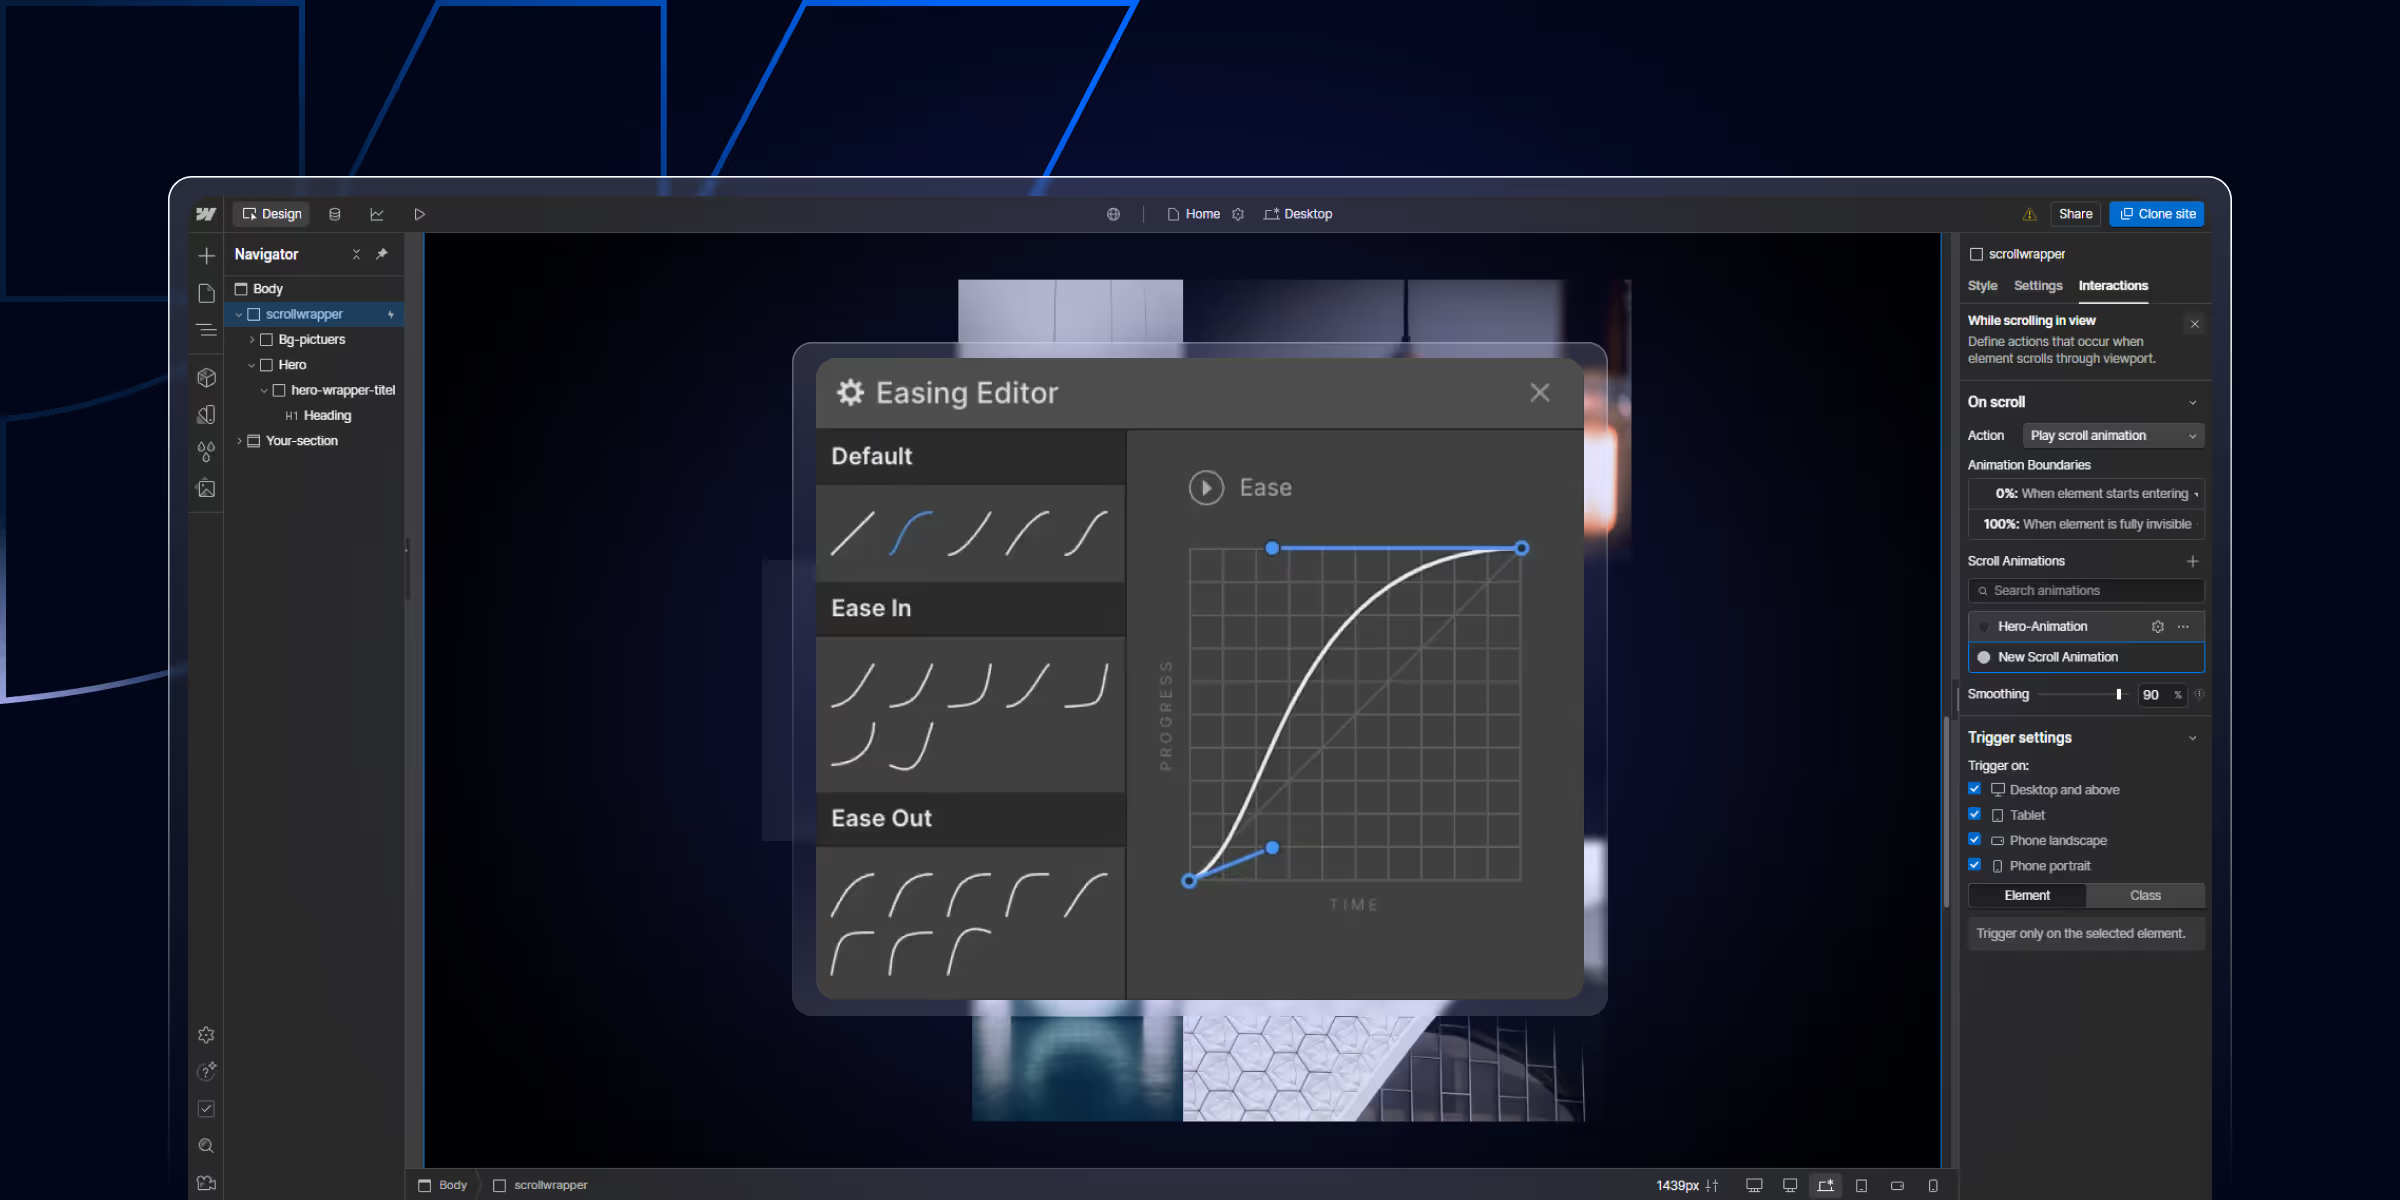
How Webflow Interactions work: trigger types (scroll, hover, click, page load), step-by-step setup, common use cases, GSAP integration, and troubleshooting when interactions don't fire.
Actionable insights to improve SEO, speed, and conversions
To add a slider in Webflow: drag the Slider element from the Add panel onto your page. Webflow's native slider supports unlimited slides, navigation arrows, dots, autoplay, and custom transitions. For more advanced sliders (multi-slide views, custom animations), use libraries like Swiper.js or Splide via an Embed element. Native slider is fastest; libraries are more flexible.
Website sliders are an interactive way to display content on websites. Whether you're showcasing your projects and portfolio, highlighting customer testimonials, or creating a hero section that grabs the attention of users immediately. With Webflow's visual editor and built-in slider element, adding and customizing a responsive slider has never been easier.
A slider is a visual component on a website that cycles through a series of content slides, either images, text, or other media, allowing users to view multiple pieces of content in the same space. Using a Webflow slider template makes it easy to implement these components, whether manual (navigated by user clicks or swipes) or automatic (content transitions on a timer).
In this guide, we'll walk designers, marketers, and business owners through how to add a slider in Webflow. By the end, you’ll know how to build, style, and optimize a slider that enhances both form and function for your website.
Choosing the right type depends on your website goals, user needs, and the kind of content you're promoting.
A Webflow slider is a built-in component within Webflow that enables you to display multiple pieces of content. The content would be a scrollable format perfect for showcasing images, testimonials, products, or featured content in an engaging way. If you're wondering how to create a carousel in Webflow, the slider is your go-to tool. A slider is a rotating set of content that transitions from one slide to another, either automatically or with user input. Sliders are commonly used to:
Must Read: 5 Best Webflow Site Sliders to Enhance Your Website
Webflow's native Slider shows one slide at a time by default. To display multiple slides simultaneously (a common need for product carousels or testimonial rows), you have two options.
slidesPerView, spaceBetween, and responsive breakpoints making multi-slide views simple.Before you dive into creating a Webflow slider, ensure the following:
By default, the slider comes with:
You can add any content inside each slide: text, images, videos, or even other Webflow elements.
Webflow offers full design flexibility for styling your slider and its content.
To make your slider responsive
Click on the Slider element to access its settings in the Element Settings panel (D key).
Here, you can
Once your slider is built and styled:
Want to take your slides to the next level? Here are some pro-level enhancements:
<script defer src="https://cdn.finsweet.com/attributes/cms-slider-1.js"></script>fs-cmssliderelement="slide" to each Collection ItemMust Read: 8 Essential Strategies To Improve Website User Experience (UX)
Browse live examples are most cloneable and free. Review the structure in Webflow Designer after cloning to understand how complex interactions and CMS bindings are set up.
While sliders are powerful tools, misuse can lead to poor UX. Here’s what to avoid:
Recommended Reading: Webflow Mobile Optimization Made Easy: Essential Tips & Tricks
Webflow makes it incredibly easy to create beautiful, responsive sliders without touching a single line of code. If you're wondering how to add slider in Webflow, it's a straightforward process that lets you build anything from product carousels to client testimonial sections or standout hero banners. The flexibility and customization options available allow you to tailor every detail to your brand and audience.
Experiment with advanced features like interactions and CMS integration, and keep UX, speed, and accessibility in mind to maximize effectiveness.
If you're a SaaS, IT, or B2B company looking to drive more leads and conversions through your website, partner with theCSS Agency—a leading Webflow agency trusted by clients worldwide.
At theCSS Agency, we specialize in crafting Webflow websites that are not only visually impressive but also optimized for lead generation and SEO. Whether you're starting from scratch or need a redesign that converts, our experts are here to help you succeed.
Book a free consultation with theCSS Agency today and discover how we can elevate your Webflow site to the next level.
Yes. With Webflow’s CMS and some custom code (or third-party tools), you can generate dynamic sliders for testimonials, blog posts, or portfolios.
While Webflow’s default slider is horizontal, you can simulate vertical sliders with interactions and custom layout positioning.
Absolutely. Embed a video element within a slide. Just ensure it doesn’t auto-play on all slides for performance reasons.
Use Webflow Interactions to link buttons or triggers to navigate between slides perfect for storytelling or custom workflows.
Yes. The Webflow Slider element supports touch swipe on mobile and tablet by default — no configuration needed. You can enable or disable it in the Slider settings under the "Allow drag" option.
There's no hard limit on number of slides in Webflow's native slider, but performance can degrade past 10-15 slides if each contains heavy media. For very large slide counts, consider using a custom solution like Swiper.js with lazy loading.
Yes. Use a Collection List inside the slider Mask element. Each CMS item becomes a slide. This works well for testimonial sliders, product carousels, and dynamic content rotations. The Slide element renders dynamically based on your CMS collection.
Finsweet CMS Slider is a free attribute-based script that connects Webflow's native slider element to a CMS Collection. Without it, you can't natively bind a Collection List to slider slides the two elements don't integrate by default in Webflow Designer. Finsweet's script bridges this gap: add the CDN link to your site's head code, apply a single attribute to your Collection Items (fs-cmssliderelement="slide"), and the Collection List items become functional slider slides. It supports autoplay, looping, arrow navigation, and multiple slider instances per page. Available for free at finsweet.com/attributes/cms-slider.
Use Webflow's native slider when: you need a simple single-slide viewer (hero, testimonial), you want zero code, or you're building with a CMS Collection using Finsweet Attributes. Use Swiper.js when: you need multiple slides visible simultaneously with precise gap and spacing control, you need autoplay that pauses on hover, you need complex responsive breakpoints, or you need advanced effects (fade, cube, coverflow). The native slider is faster to build and requires no CDN dependency. Swiper.js is more flexible but requires building the HTML structure in an Embed element and initializing it with JavaScript.


Sanket Vaghani has 8+ years of experience building designs and websites. He is passionate about building user centric designs and Webflow. He build amazing Webflow websites and designs for brands.
How Webflow Interactions work: trigger types (scroll, hover, click, page load), step-by-step setup, common use cases, GSAP integration, and troubleshooting when interactions don't fire.

Learn how to build a high-impact B2B SaaS SEO strategy that attracts qualified leads, boosts rankings, and drives consistent revenue. Step-by-step framework with real growth tactics

A Webflow Premium Partner is an agency at the top tier of Webflow's official partner program.
Quick Turnaround. No Contracts. Cancel Anytime. Book a 30 minutes consulting call with our expert.