


Webflow Interactions and Animations: Complete Guide (2026)
How Webflow Interactions work: trigger types (scroll, hover, click, page load), step-by-step setup, common use cases, GSAP integration, and troubleshooting when interactions don't fire.
Actionable insights to improve SEO, speed, and conversions
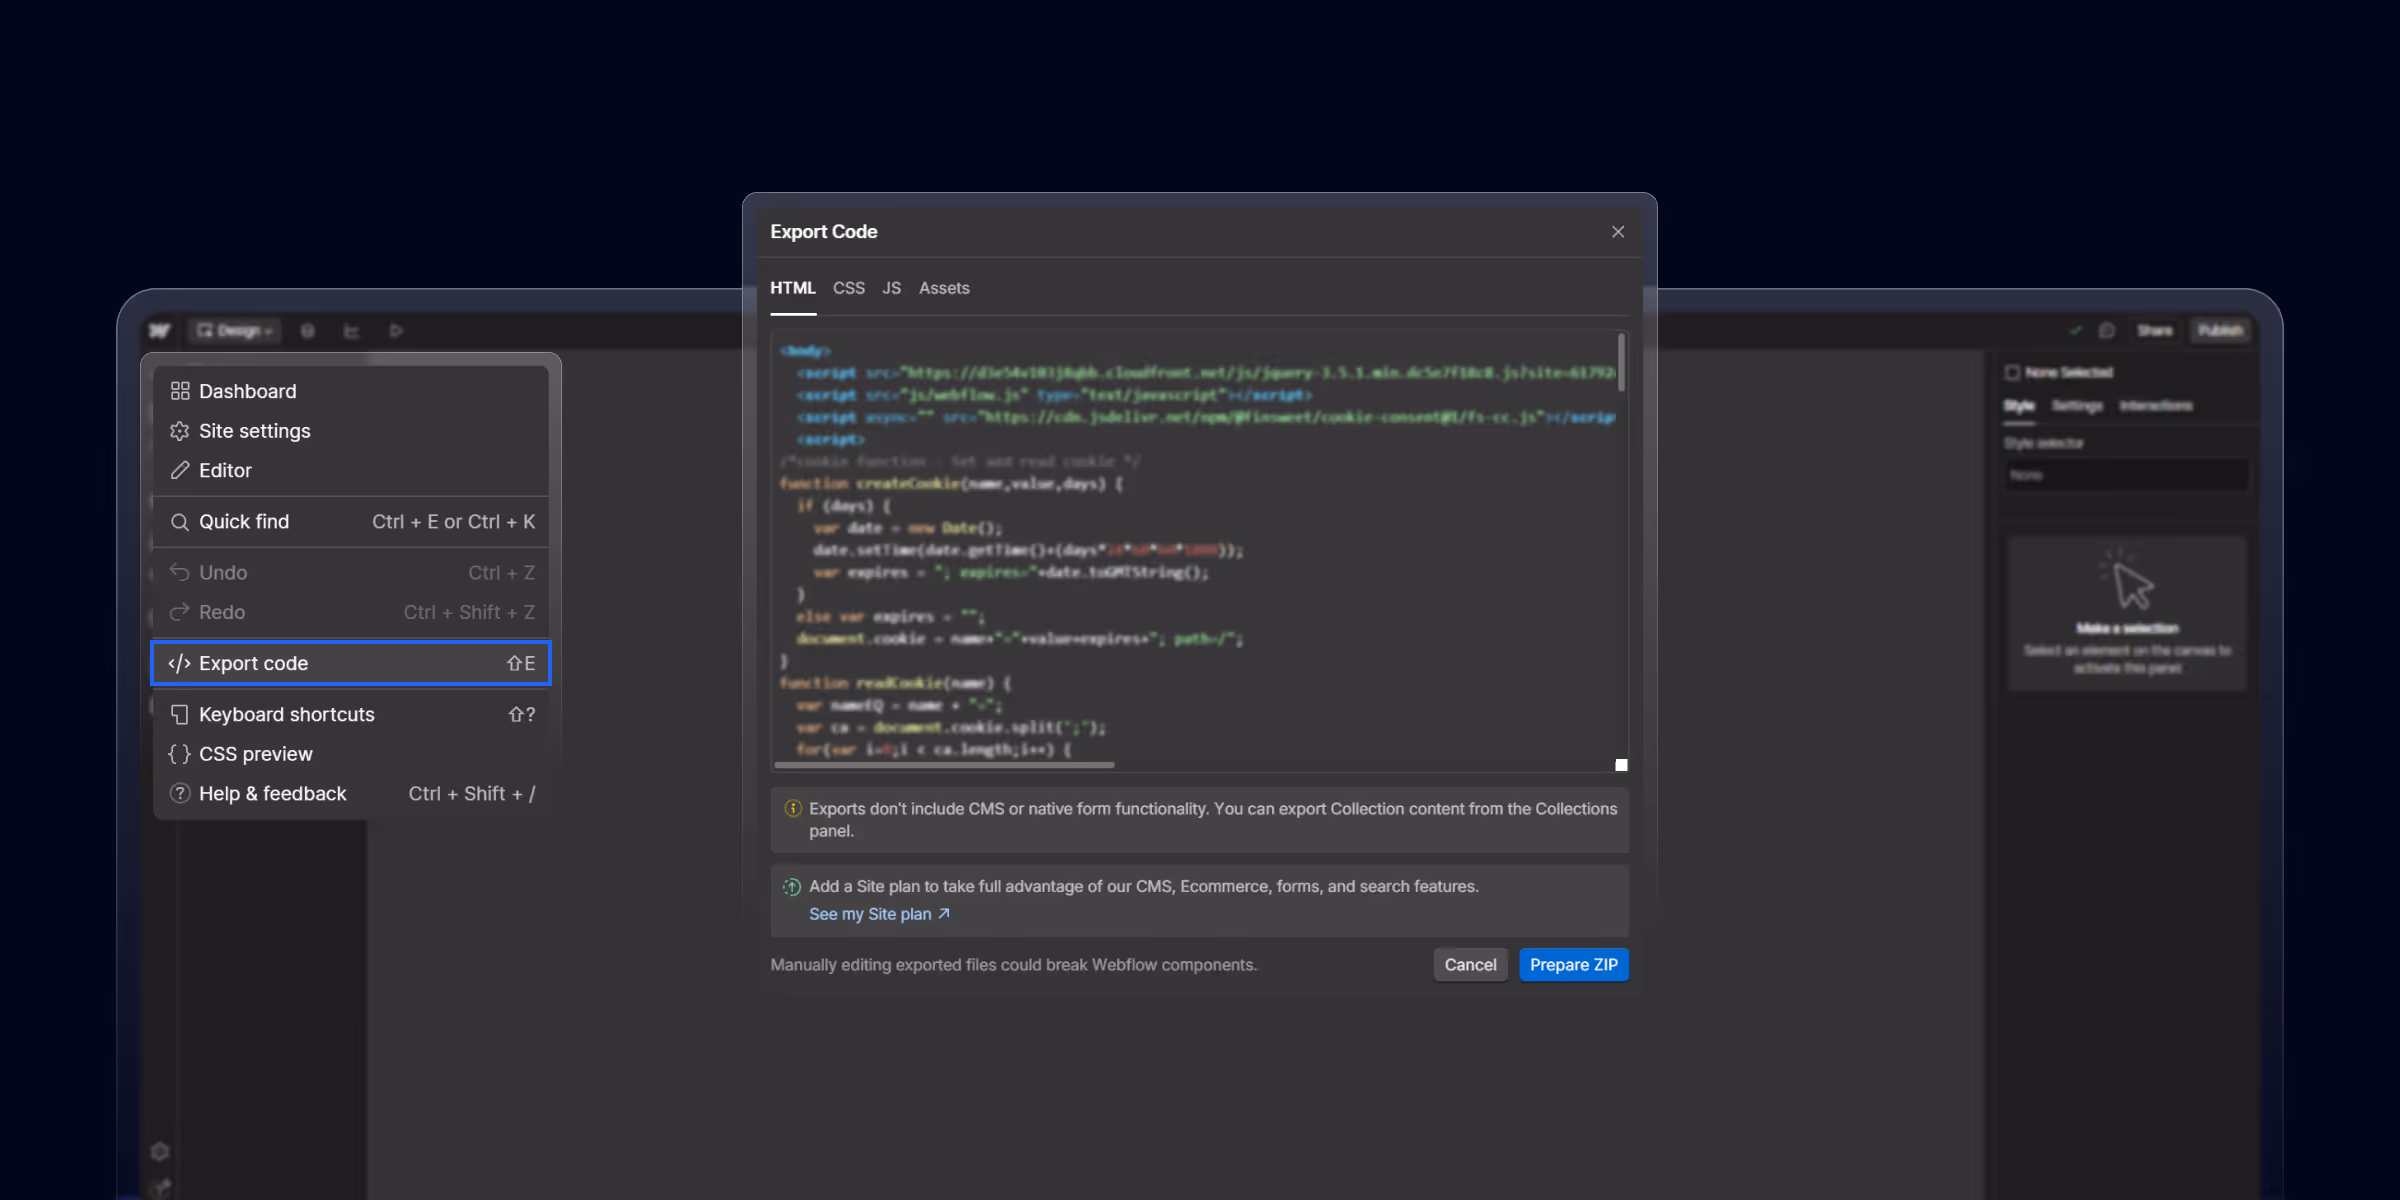
To export code from Webflow, open the project and press Shift + E, or use the "…" menu and choose Export Code. Webflow generates a ZIP containing clean, semantic HTML, CSS, and JavaScript. Code export requires a paid Account plan (or a Site plan), and it does not include CMS content, Ecommerce, or native form handling.
Webflow lets you export your site's front-end code as a ZIP file containing HTML, CSS, JavaScript, and assets but only on paid Workspace plans. The exported code is production-ready static markup that you can host anywhere, but Webflow CMS, ecommerce, and form processing stay tied to Webflow's hosted environment. This guide covers exactly what's exportable, the step-by-step process, common limitations, and what you can do with the exported files.
Yes, Webflow does allow you to export your website’s front-end code, but only if you've purchased a paid plan.
When you export a Webflow project, Webflow provides you with the following:
With Webflow code export, the exported code is fully editable and can be hosted on any server of your choice.
Make sure you understand that not everything in Webflow is exportable. Here’s what you can’t export:
So while exporting is a powerful feature, it’s most useful for static or mostly static websites such as landing pages, portfolios, brochure sites, or static marketing websites. Webflow has redefined a powerful website-building platform that merges design, animation, and code without writing code. But sometimes you need the actual code. Maybe you want custom hosting or need to add backend features. That's when Webflow export code becomes useful.
Currently, Webflow does not allow code export on the free Starter plan. To download HTML, CSS, and JS files, you need a paid Workspace plan. However, you can clone public templates and export code if your workspace supports it.
Exporting code from Webflow is straightforward. Here’s a step-by-step breakdown:
Go to Webflow and log in to your account. Once logged in to your account, you will see your Dashboard with all your projects.
Click on the Webflow project that you want to export. You’ll be taken to the Designer interface.
Inside the Designer interface, look for the Export Code icon located in the top-right corner of the interface, which looks like a square with an arrow pointing upward. Click on it to open the export options.
Click the "Prepare ZIP" button. Webflow will bundle all your HTML, CSS, JavaScript, and assets into a ZIP file. This process usually takes a few seconds.
Once the ZIP file is ready, download it to your computer. You now have full access to your website’s front-end code and can use it however you like.
A Webflow code export includes static HTML for each page, all CSS (including your styles and Webflow's base styles), JavaScript for interactions, and your image/asset files. It does not include CMS Collection content, Ecommerce functionality, form submission handling, or any dynamic features that depend on Webflow hosting.
/index.html
/about.html
/contact.html
/css/
    styles.css
/js/
    webflow.js
    jquery.js
/images/
    logo.png
hero-background.jpgTo ensure your exported code remains performant and maintainable, follow these best practices:
While Webflow supports custom code blocks, overusing them can clutter your export and make maintenance harder. Use Webflow’s native design tools whenever possible, and keep custom scripts modular and organized.
Naming your classes consistently (e.g., btn-primary, hero-section, footer-links) improves code readability and makes collaboration easier for developers working with exported files.
Avoid using generic or auto-generated names like div-block-10.
Once you deploy your exported site, run it through tools like:
Optimize images, minify scripts, and consider using a CDN to improve performance.
Run your site through speed testing tools. Compress images to load faster. Consider using a CDN for better global performance. Clean up unused CSS if needed.
Yes. Exported Webflow code is standard HTML/CSS/JS, so you can host it on Netlify, Vercel, GitHub Pages, or any web server. The catch: you lose CMS, forms, and Ecommerce, which only run on Webflow hosting. Many teams export for fully static sites and stay on Webflow hosting when they need dynamic content.
If you're stuck on how to export Webflow code, reach out to the experts theCSS Agency helps businesses export, customize, and deploy Webflow sites. We make sure your code is clean and works well.
Our team handles SaaS, IT, and B2B websites. We can help you self-host, connect APIs, or build custom features on top of your Webflow design.
No. Webflow CMS content (Collections and dynamic data) cannot be exported. If your site relies on CMS data, you’ll need to recreate it manually or use an external headless CMS with custom development.
No. As of 2026, Webflow does not allow code export on the free Starter plan. Code export requires a paid Workspace plan ($16/month minimum) or a paid Site plan with the "Code Export" feature enabled.
Yes. Webflow generates semantic HTML with proper tag hierarchy, meta tags, and image alt attributes, making the exported code SEO-ready. However, you should still manually review metadata and structure after export.
Webflow code export includes all HTML files (one per static page), CSS stylesheets, JavaScript files (including webflow.js for animations), image and font assets. CMS content, ecommerce data, and form submission handling are NOT included.
Yes. The exported code is fully editable plain HTML, CSS, and JavaScript. You can modify it in any code editor, push it to GitHub, deploy to Vercel/Netlify/AWS, or integrate it with any backend system.
Yes. All responsive breakpoints, media queries, and Webflow's flexbox/grid implementations are preserved in the exported CSS. The site will look identical to the Webflow version across desktop, tablet, and mobile.


Sanket Vaghani has 8+ years of experience building designs and websites. He is passionate about building user centric designs and Webflow. He build amazing Webflow websites and designs for brands.
How Webflow Interactions work: trigger types (scroll, hover, click, page load), step-by-step setup, common use cases, GSAP integration, and troubleshooting when interactions don't fire.

Learn how to build a high-impact B2B SaaS SEO strategy that attracts qualified leads, boosts rankings, and drives consistent revenue. Step-by-step framework with real growth tactics
A Webflow Premium Partner is an agency at the top tier of Webflow's official partner program.
Quick Turnaround. No Contracts. Cancel Anytime. Book a 30 minutes consulting call with our expert.