How to Create a Blog on Webflow: Step-by-Step Guide

How to Create a Blog on Webflow: Step-by-Step Guide

Table of content

Blogging remains one of the most effective strategies for building brand authority, increasing organic traffic, and engaging audiences. But the success of a blog isn’t just about what you write; it’s also about how you build it.

Webflow, a visual development platform, allows users to create fully customized websites without writing a single line of backend code. Its flexibility and built-in CMS make it an excellent choice for launching a blog that stands out both in design and performance.

In this guide, we’ll show you how to create a powerful blog using Webflow. Whether you’re a designer, developer, or marketer, you’ll find actionable insights and SEO techniques to help you launch and scale your blog.

Why Choose Webflow for Blogging?

1. No-Code/Low-Code Flexibility

Webflow provides no-code/low-code flexibility. Webflow eliminates the need for WordPress plugins or third-party platforms. With its visual drag-and-drop builder, even non-coders can build professional-grade blogs.

2. Custom Design Freedom

Unlike traditional CMSs (content management systems) that lock you into predefined themes, Webflow gives you complete control over the layout, animation, typography, and user interactions.

3. Built-in CMS and SEO Features

Webflow CMS manages blog content efficiently while offering SEO tools such as titles, meta tags, 301 redirects, schema support, and more.

4. Fully Responsive Design

Webflow automatically optimizes your blog for mobile, tablet, and desktop. With built-in responsiveness tools, your content looks excellent on every screen.

5. Ideal for Agencies, Startups, and Creators

From portfolio blogs to SaaS content hubs, Webflow is suitable for various industries. It streamlines the publishing workflow while maintaining creative control.

Preliminary Steps Before You Start Webflow Blog

1. Define Your Blog Goals

Ask yourself:

  • Who is your target audience?
  • What niche or industry will your blog focus on?
  • What is your content tone (educational, casual, professional)?
  • Will you post how-tos, opinion pieces, case studies, or industry news?

2. Plan Blog Structure

Before jumping into Webflow, map out:

  • Main categories and tags
  • Navigation hierarchy
  • Sidebar features (e.g., popular posts, categories, recent posts)

3. Gather Brand Assets

Ensure you have all necessary brand elements:

  • Logo (SVG or PNG)
  • Brand colors and typography
  • Social media handles and favicons

4. Choose a Webflow Plan

To use the CMS feature, opt for a CMS or business plan. CMS plans allow you to

  • Add and manage blog content
  • Invite content editors.
  • Scale with up to 2,000 CMS items

How to Create in Webflow: Step-by-Step Guide

Step 1: Set Up a New Project or Choose a Template

Here you have two options:

  1. Start from Scratch: Create a blank canvas and design every element according to your way.
  2. Use a Blog Template: Choose from hundreds of pre-designed blog templates in Webflow Marketplace.

Step 2: Create the Blog CMS Collection

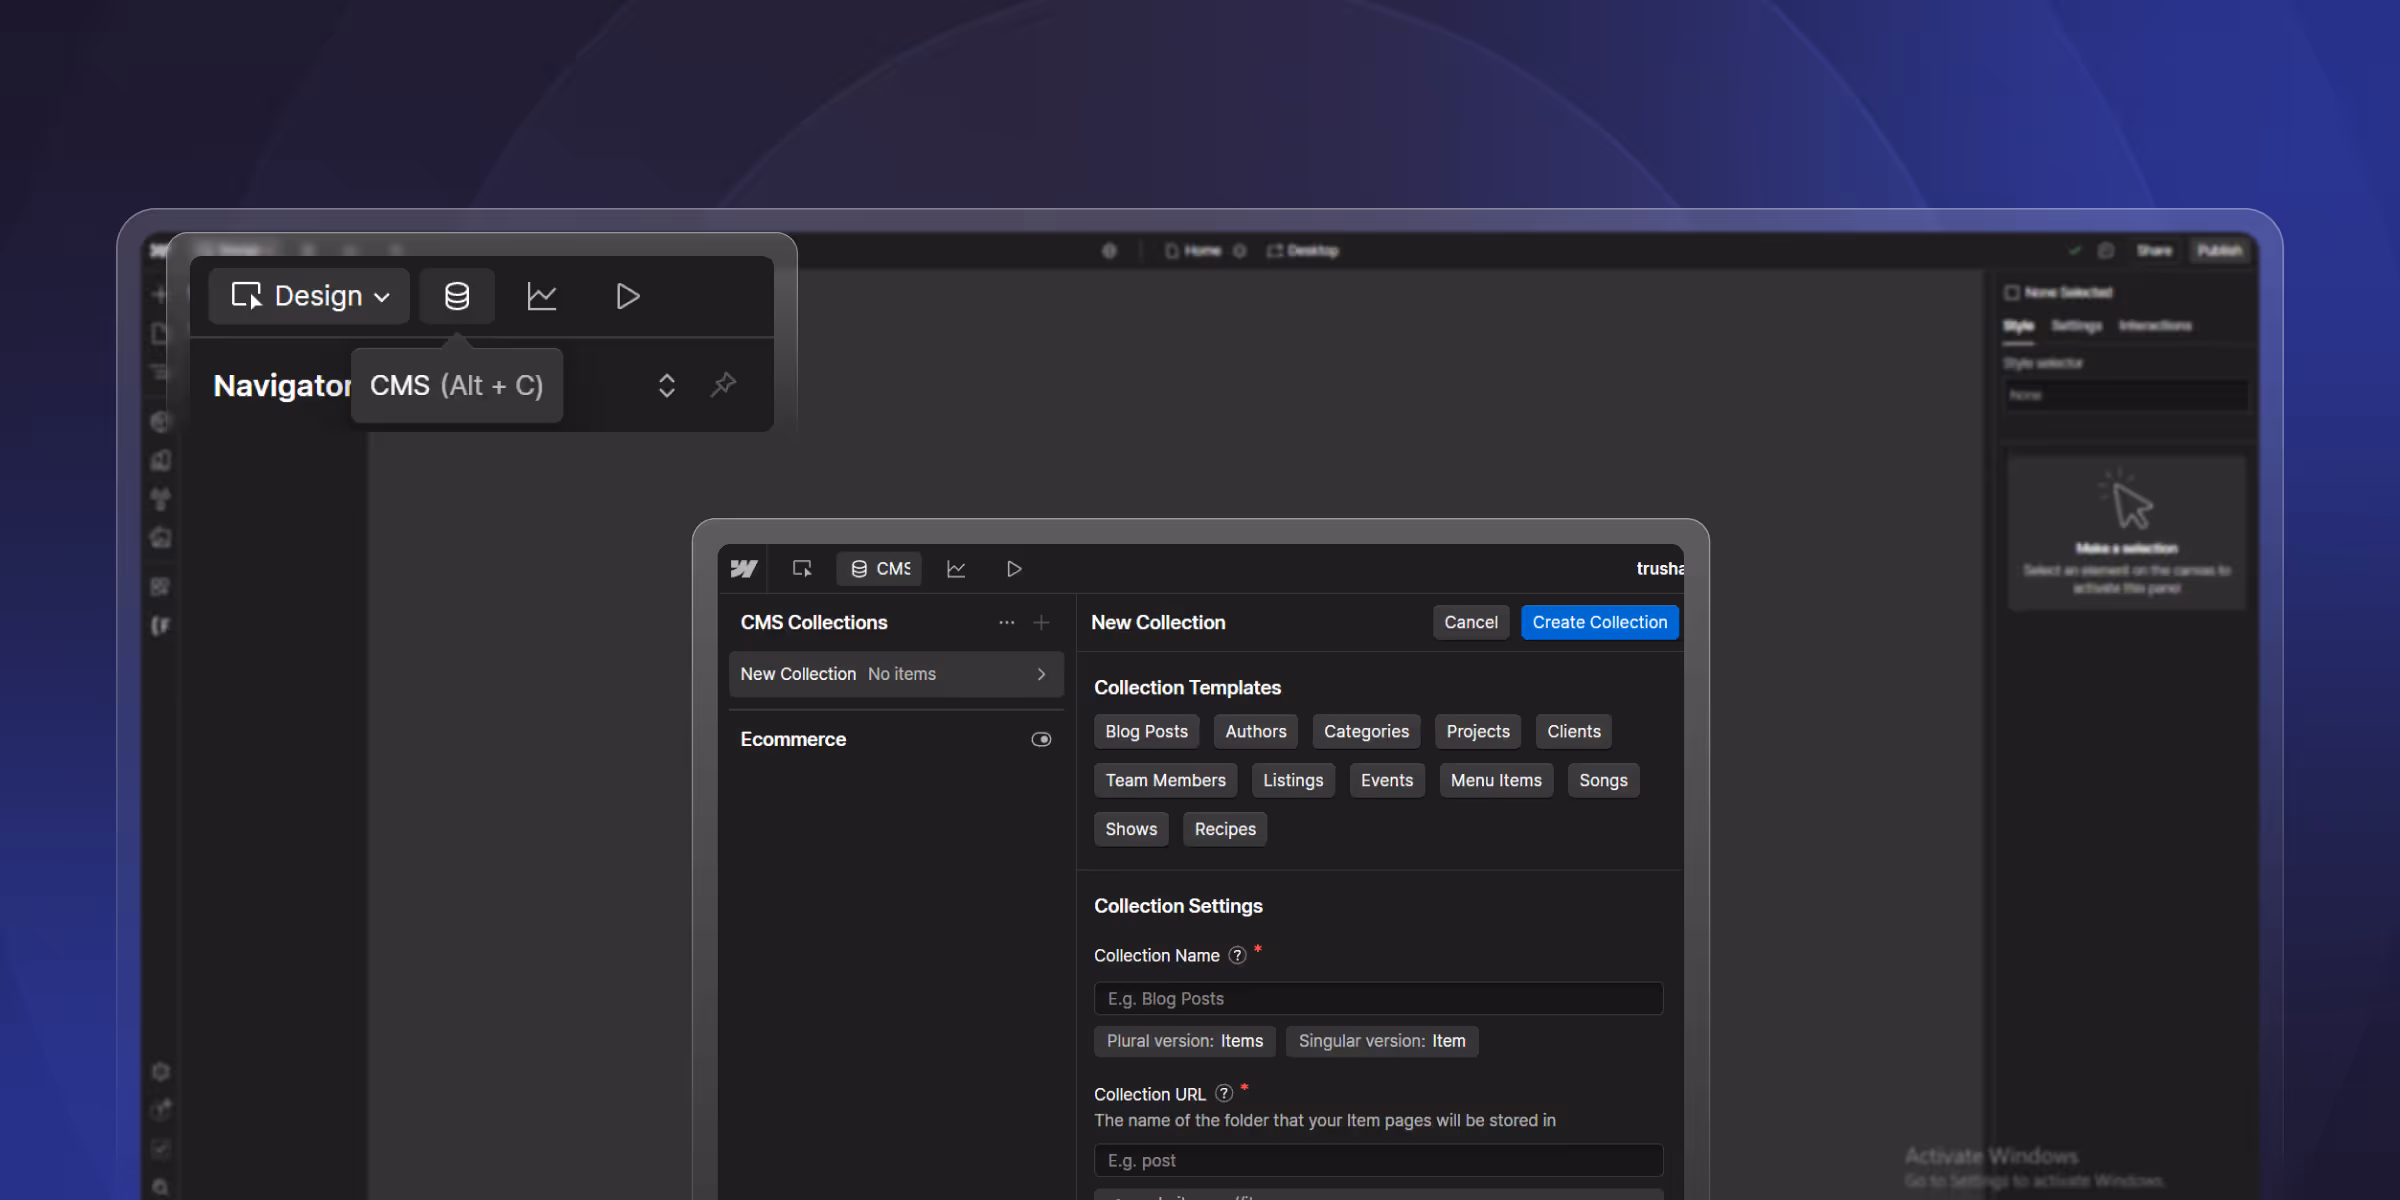
Webflow CMS collections are like content databases.

How to Create One:

  • Go to the CMS tab
  • Click "+ New Collection."
  • Name it "Blog Posts."

Essential Fields to Add:

  • Title (Plain Text)
  • Slug (Auto-generated or custom)
  • Rich Text (for body content)
  • Thumbnail Image
  • Author Name
  • Publish Date
  • Tags or Categories

These fields allow you to create dynamic content that displays across your site.

Step 3: Design the Blog Post Template Page

Each CMS collection generates a template page for that content type.

  • Open the "Blog Posts Template" page
  • Drag dynamic elements like Rich Text, Images, and Headings from the CMS
  • Style the content using Webflow Designer
  • Use conditional visibility to hide/show elements (e.g., "Author" only when available)

Step 4: Design the Blog Listing Page (Blog Home)

  • Create a static page (e.g., /blog)
  • Add a collection list bound to "Blog Posts."
  • Sort by publish date (newest first)
  • Display preview elements: thumbnail, title, short excerpt, and read more button

Additional Features:

  • Add pagination for long post lists
  • Use category/tag filters for better navigation

Step 5: Add Supporting Pages

Consider adding:

  • Categories Page: Group posts under main topics
  • Author Pages: Showcase individual contributors
  • About Page: Explain your blog’s mission
  • Contact Page: Add forms for reader feedback or collaboration

Step 6: Connect Navigation and Footer Links

  • Update your site-wide navigation bar
  • Link to:

    • Blog home (/blog)
    • About, Contact, Category pages
    • Social profiles

Include CTAs like

  • Newsletter subscription form
  • "Get in Touch" or "Start Reading"

Step 7: Test Blog Functionality Across Devices

Before you go live blog:

  • Use Webflow’s built-in preview modes
  • Test dynamic elements (e.g., linked CMS fields)
  • Check mobile and tablet views
  • Validate links and CTAs

Step 8: Publish Your Blog

  • Click "Publish to Webflow.io" for testing
  • Connect a custom domain under Project Settings > Hosting
  • Use Webflow’s domain setup wizard to point DNS records
  • Hit Publish

How to Write and Manage Blog Posts in Webflow

1. Add New Blog Posts via Webflow CMS

Go to the CMS panel > Blog Posts > Add New Item

  • Enter your post details
  • Upload thumbnail
  • Assign tags
  • Click "Create & Publish"

2. Use the Webflow Editor for Client-Friendly Editing

The Webflow Editor lets clients or content creators update blog posts without touching the Designer.

  • Enable editor access under project settings.
  • Contributors can edit text, images, links directly on the live site interface

3. Schedule Content or Edit Posts Later

While Webflow doesn’t natively support post scheduling, you can:

  • Add a "Publish Date" field
  • Use conditional visibility to show posts only after the publish date
  • Edit, update, or unpublish content anytime

SEO Best Practices for Webflow Blogs

1. Set SEO Titles and Meta Descriptions

Under the CMS Template Page > Settings:

  • Use dynamic fields like [Post Title] | Blog Name
  • Add compelling meta descriptions for each blog

2. Use Alt Text and Headings Properly

  • Always add descriptive alt text to images
  • Structure content using H1 (title), H2 (subheadings), and H3s
  • Avoid using multiple H1s on a single page

3. Internal Linking and Navigation

  • Link related blog posts within each article
  • Create category pages and add navigation links
  • Use breadcrumbs for better UX

4. Integrate Analytics and Webmaster Tools

  • Add Google Analytics and Search Console scripts via Project Settings > Custom Code
  • Submit your sitemap.xml to Google
  • Enable auto-generated robots.txt and sitemap

Conclusion

Creating a blog in Webflow combines creative freedom with powerful CMS and SEO tools. From setting up a CMS collection to publishing and optimizing your blog for search engines, every step is intuitive and scalable.

Whether you’re building a personal blog, a SaaS content hub, or a branded editorial platform, Webflow gives you full control over design, structure, and content.

Start simple, stay consistent, and evolve your blog based on feedback and data.

How theCSS Agency Helps with Webflow Blog Setup

theCSS Agency specializes in building high-performing, SEO-optimized blogs using Webflow, designed to drive traffic, engage readers, and convert leads. Here’s how we help you get started and scale fast:

  • Custom Blog Design: We fully craft tailored blog layouts that align with your brand’s identity.
  • CMS Setup & Structuring: We set up your Webflow CMS collections for blog posts, authors, categories, and tags.
  • SEO Optimization: From meta tags to schema markup, we implement on-page SEO best practices to help your blog rank.
  • Responsive Development: Every blog page we build is optimized for mobile, tablet, and desktop.
  • Content Migration: Moving from WordPress or another CMS? We’ll migrate your existing content.

Ready to launch a powerful Webflow blog? Partner with theCSS Agency. We will handle the tech, design, and SEO so you can focus on content that converts.

FAQ: Create Webflow Blog

1. Can you use Webflow for blogging?

Yes, Webflow is a powerful platform for blogging. Webflow's built-in CMS allows you to create, manage, and publish blog posts with complete design flexibility without relying on third-party plugins. You can build a fully custom blog that aligns with your brand and user experience goals.

2. Is Webflow good for SEO blogs?

Absolutely. Webflow offers robust SEO features like clean code, fast page speeds, customizable meta tags, alt attributes, canonical tags, and schema support. This makes it an excellent choice for building blogs that rank well in search engines and provide great UX.

3. Can I migrate my existing blog to Webflow?

Yes, you can migrate your blog to Webflow. You’ll need to export your content (usually as a CSV) and import it into Webflow’s CMS. While the process is manual, it gives you the opportunity to redesign and optimize your blog layout, improve structure, and enhance SEO.

4. Do I need to know coding to start a blog on Webflow?

No, coding knowledge is not required to start a blog in Webflow. Its visual designer and CMS tools make it easy to build and manage a blog using drag-and-drop functionality. However, developers can add custom code if needed for advanced features.

5. Is Webflow CMS free? 

Webflow CMS is not included in the free plan. To use CMS features like blog collections and dynamic content, you’ll need a CMS site plan (starting at $29/month) or higher. It is an essential tool for building and scaling a content-driven site.

Viken Patel

Viken Patel

Viken Patel has 14+ years of experience working with websites. He is passionate about building website that converts. His marketing background helps him build the sales driven websites.

Webflow Editor vs Webflow Designer: What’s the Difference?

Webflow Editor vs Webflow Designer: What’s the Difference?

See the key differences between Webflow Editor & Webflow Designer to understand which tool best suits your website management and design needs.

Benefits of Webflow Development Agency 2025

Benefits of Webflow Development Agency 2025

Discover the top benefits of hiring a Webflow agency to build high-converting, responsive websites that boost SEO, user experience, and business growth.

How to Add Schema Markup in Webflow: Step-by-Step Guide 2025

How to Add Schema Markup in Webflow: Step-by-Step Guide 2025

Learn how to add schema markup in Webflow with this step-by-step guide to boost SEO, enhance rich results, and improve your site's search visibility.

Partner with a Webflow Agency for your Webflow website.

Quick Turnaround. No Contracts. Cancel Anytime. Book a 30 minutes consulting call with our expert.