


Webflow Premium Partner: What It Means and Why It Matters
A Webflow Premium Partner is an agency at the top tier of Webflow's official partner program.
Actionable insights to improve SEO, speed, and conversions
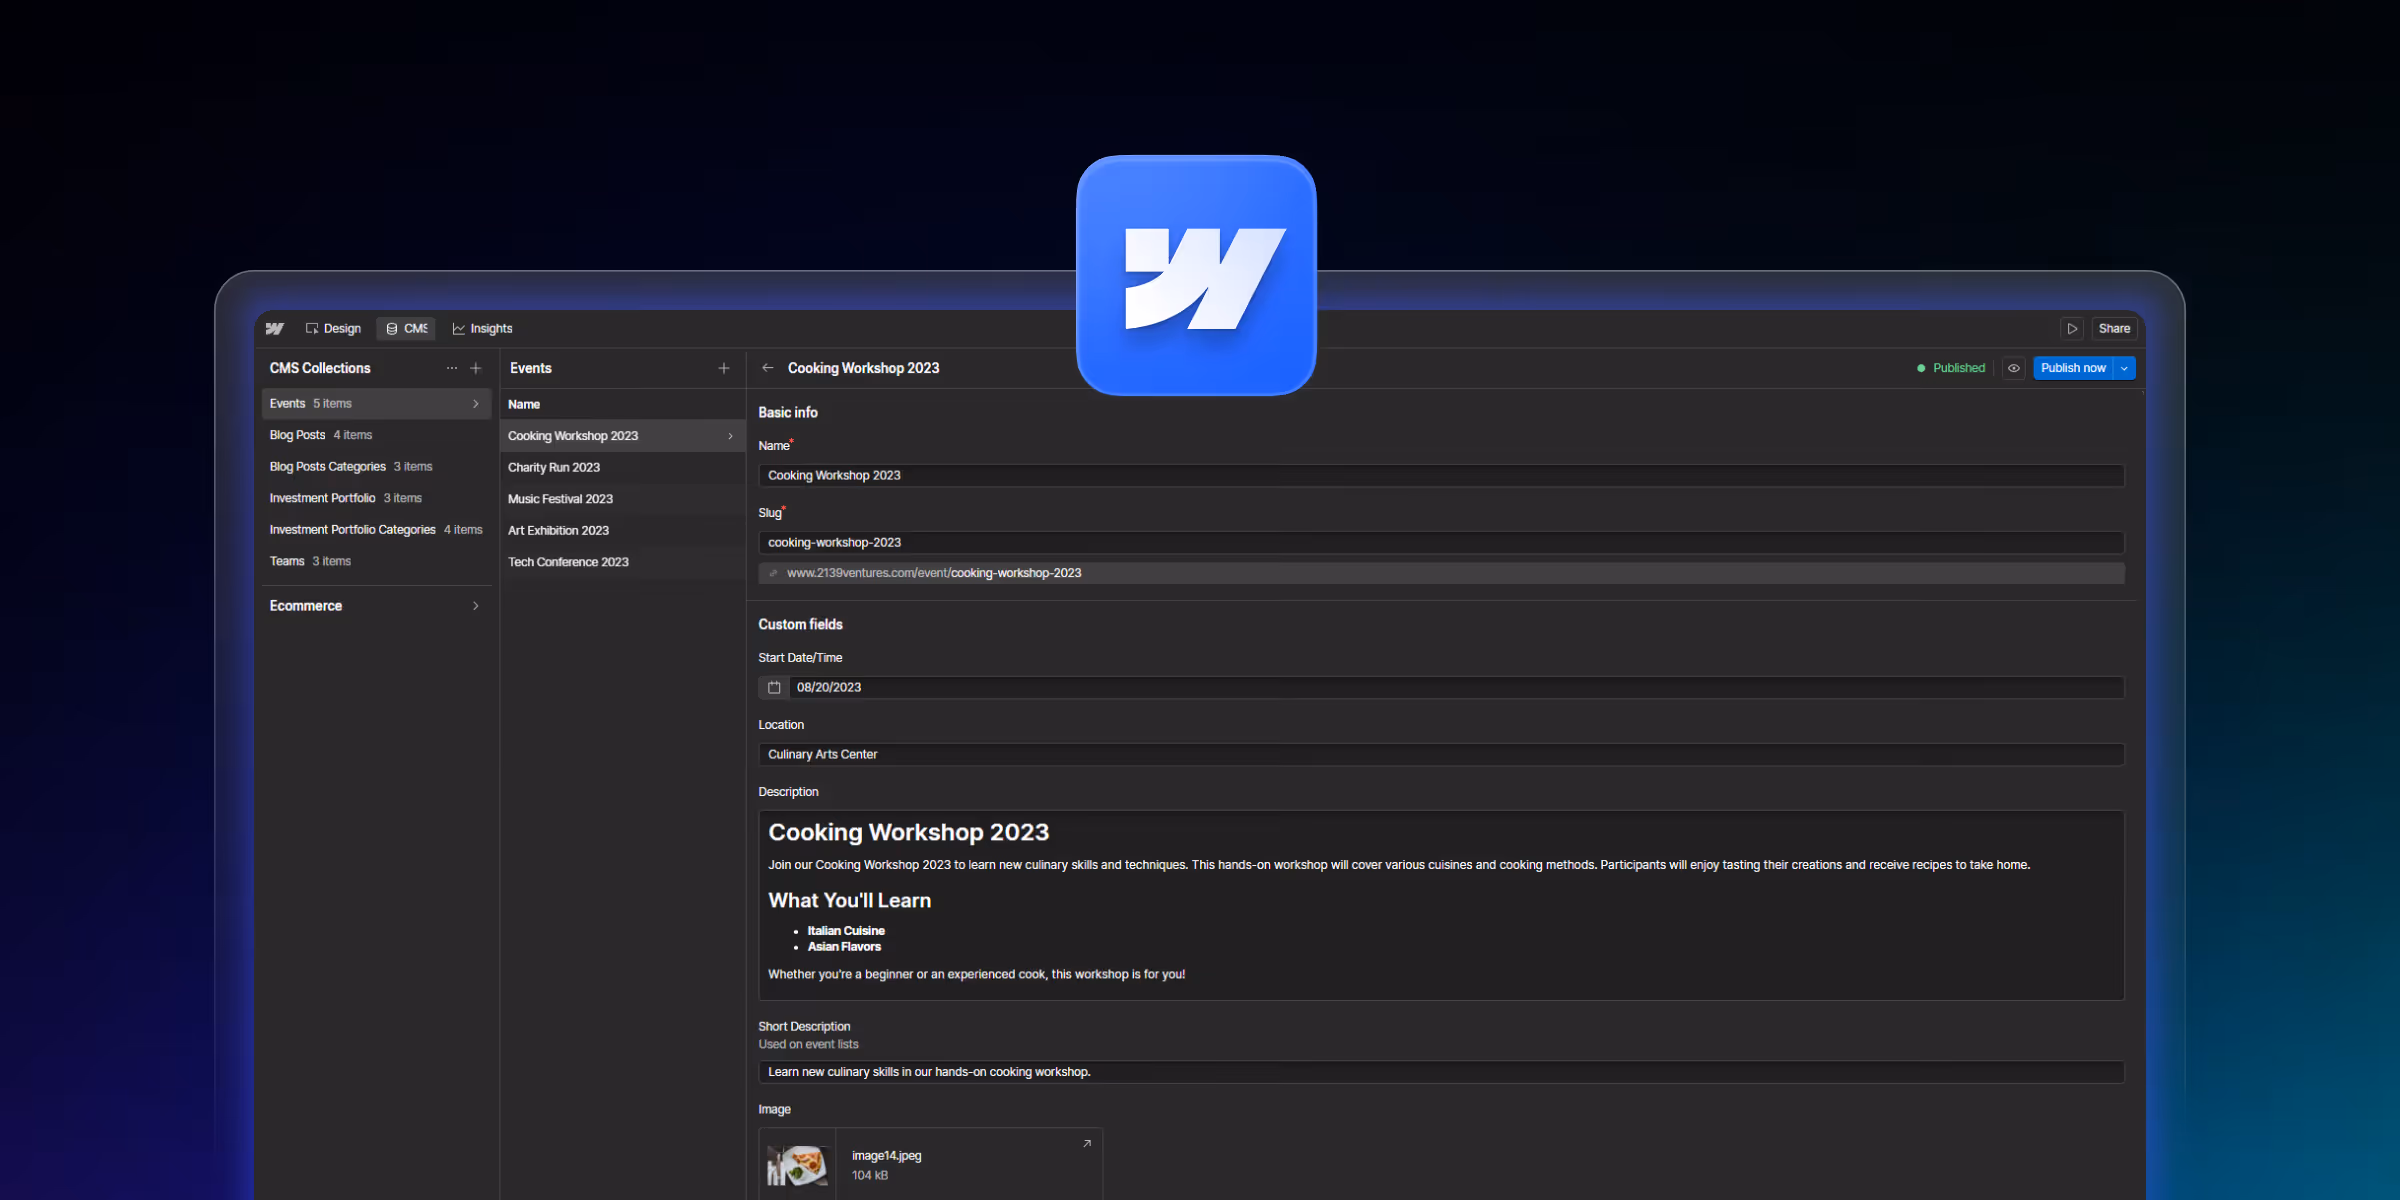
Webflow CMS import functionality enables efficient content management whether you're migrating from WordPress, managing product catalogs, or maintaining large content databases. From native CSV imports to API integrations, Webflow provides multiple pathways for bringing external content into your CMS collections.
Webflow CMS lets you import content three ways: CSV upload (best for one-time migrations under 10,000 items), the Webflow CMS API (best for ongoing sync with another system), and third-party connectors like Whalesync (best for two-way sync with Airtable, Notion, or HubSpot).
This guide covers each method step-by-step, including how to prepare your data, map fields, handle reference fields, and fix the most common import errors.
Time savings multiply exponentially with content volume. Importing 1,000 collection items via CSV takes the same 15-20 minutes as importing 100 items, while manual entry scales linearly with each additional item.
Migration from legacy platforms becomes feasible for content-heavy sites. WordPress sites with thousands of posts, Shopify stores with extensive product catalogs, and custom databases can transition to Webflow without recreating content manually.
Scalable content management supports growing businesses and dynamic sites. Directory listings, event calendars, and programmatic SEO pages require bulk import capabilities that manual entry cannot efficiently support.
WordPress to Webflow migrations represent the most frequent import use case. Blogs, corporate sites, and portfolios moving from WordPress benefit from CSV export tools that transform WordPress data into Webflow-compatible format.
E-commerce product catalogs with hundreds or thousands of SKUs require bulk import functionality. Product names, descriptions, prices, images, and variant data are imported efficiently via CSV or API.
Text and rich text fields accept plain text or HTML-formatted content. Rich text fields preserve formatting, links, and basic HTML structure during import.
Image and multi-image fields require publicly accessible image URLs. Webflow downloads images from provided URLs and stores them in Webflow's CDN during import. Multi-image fields accept multiple URLs separated by semicolons.
Video fields support any Embedly-compatible video hosting provider, including YouTube, Vimeo, Loom, and Wistia. Import video fields using the public video URL.
Reference and multi-reference fields link collection items to other collections. Reference imports require matching slug values between collections. Multi-reference fields accept multiple slugs separated by commas.
Date and number fields require consistent formatting. Dates should follow YYYY-MM-DD format, while numbers should use standard numeric notation without currency symbols or formatting.
4MB maximum file size limits CSV imports to approximately 10,000-15,000 rows depending on field complexity. Larger datasets require splitting into multiple CSV files.
Image hosting requirements mandate that images have publicly accessible URLs. Images must be uploaded to image hosting services or CDNs before import, as Webflow cannot import from local file paths.
Video hosting via Embedly providers restricts video imports to supported platforms. Self-hosted videos require uploading to compatible hosting services before importing to Webflow.
Data format specifications require proper CSV structure with comma-separated values, UTF-8 encoding, and escaped special characters. Inconsistent formatting causes import errors.
Collection structure prerequisites mandate creating collection structures with appropriate fields before import. You cannot create collections during import, only populate existing ones.
Structuring data with proper headers begins with creating a CSV file where the first row contains column headers that match your Webflow collection field names.
The required vs. optional fields distinction matters during import. Webflow requires data for all mandatory collection fields. Optional fields can remain empty but should still have header columns.
Date formatting standards require YYYY-MM-DD format (e.g., 2025-11-04) for proper import. Inconsistent date formats cause import failures or incorrect date values.
Image URL preparation involves hosting images on publicly accessible servers and creating a CSV column with direct image URLs. For multi-image fields, separate multiple URLs with semicolons.
Reference field formatting requires using the referenced item's slug value, not its name or ID. For multi-reference fields, separate multiple slugs with commas.
Updating existing items via item ID enables bulk corrections without creating duplicates:
Export button functionality provides one-click CSV generation:
Understanding the exported CSV structure reveals important columns:
Item ID preservation for updates enables the export-edit-reimport workflow. The Item ID column connects CSV rows to existing collection items during reimport.
Continuous sync capabilities enable automated imports on schedules. Set CSV source location, and PowerImporter syncs changes automatically without manual uploads.
Unique identifier mapping requires selecting a CSV column with no duplicate values and mapping it to a Webflow text field (typically slug). PowerImporter uses this to identify matching items for updates vs. creates.
Update vs create logic allows configuring whether PowerImporter creates new items when identifiers don't match or ignores them. This prevents unwanted duplication.
Airtable to Webflow integration enables using Airtable as a content management interface while Webflow handles presentation. Changes in Airtable sync automatically to Webflow CMS.
Notion database syncing connects Notion databases to Webflow collections for teams comfortable with Notion's interface. Two-way sync keeps both platforms current.
Google Sheets connectivity allows non-technical team members to manage content in a familiar spreadsheet interface while Whalesync syncs to Webflow automatically.
Two-way sync capabilities ensure changes in Webflow reflect back to the source platform, maintaining consistency across tools without manual updates.
Trigger-based imports create Webflow CMS items when events occur in other platforms (form submissions, new rows in sheets, e-commerce orders).
Multi-platform connections enable complex workflows connecting CRMs, email platforms, payment processors, and databases to Webflow CMS.
Automated workflow creation through a visual interface requires no coding. Configure triggers, actions, and field mappings through Zapier's interface.
The Webflow CMS API is the right choice for imports above 10,000 items, recurring syncs with another database, or migrations from systems like Contentful or Sanity that don't export clean CSVs.
The basic flow:
POST /collections/{collection_id}/items endpoint to create items, one per request or batched up to 100PATCH /collections/{collection_id}/items/{item_id} for incremental updates on existing itemsIf you're migrating an existing site, the most common pattern is: export source content to JSON → transform to Webflow's field schema → push via API. Most teams write a Node.js or Python script for this. Webflow's official SDK supports both.
Authentication and access tokens secure API access:
POST https://api.webflow.com/v2/collections/{collection_id}/items

{
  "fieldData": {
    "name": "Blog Post Title",
    "slug": "blog-post-slug",
    "post-body": "<p>Content here</p>",
    "featured-image": "https://example.com/image.jpg"
  }
}
PATCH https://api.webflow.com/v2/collections/{collection_id}/items/{item_id}

{
  "fieldData": {
    "name": "Updated Title"
  }
}
Batch operations through loops or parallel processing handle large datasets efficiently. Implement error handling and retry logic for robust imports.
Rate limits and best practices restrict API calls (typically 60 requests/minute for standard plans). Implement rate limiting in scripts and batch requests appropriately.
If your Webflow site uses Webflow's native Localization feature, CMS imports work differently from standard single-locale imports. Here is what to know before attempting a localized import:
Webflow's CSV importer imports content into the primary locale only by default. Localized field values (the translated versions of text fields) cannot be bulk-imported via CSV at this time they must be added manually through the Webflow Editor or via the CMS API with locale-specific payloads.
PATCH /collections/{collection_id}/items/{item_id} endpoint accepts a locale parameter use this to update each item's translated fields per locale.Whalesync supports multi-locale CMS syncing from Airtable or Google Sheets each locale can have its own column in the source sheet, which Whalesync maps to the corresponding Webflow locale during sync. This is currently the most practical no-code option for ongoing localized content management.
For a full guide to Webflow's localization system, see our Webflow localization guide.
Importing content into Webflow CMS transforms time-consuming manual entry into efficient bulk operations that save dozens of hours on large projects. The four methods covered native CSV import, export-edit-reimport workflow, third-party tools, and CMS API—serve different scales and complexity levels.
Method selection depends on project requirements. CSV import handles most migrations efficiently, export-edit-reimport enables quick bulk corrections, third-party tools provide automation for ongoing syncing, and APIs support enterprise-scale custom integrations.
Preparation determines success more than technical execution. Well-structured CSV files with proper field mapping, clean data, and verified image URLs import smoothly, while poorly prepared data causes errors regardless of import method.
Post-import validation protects content quality and user experience. Systematic review of imported content, image verification, reference field checking, and functionality testing catch issues before site publication.
For most teams, CSV import handles 80% of cases it's the fastest path and requires no code. Use the API when you're above 10,000 items or need automated sync. Use a third-party tool (Power Importer, Whalesync) when you need recurring imports without writing scripts.
theCSS Agency handles complex Webflow CMS migrations WordPress, Contentful, and custom database imports with full SEO redirect mapping. Book a call if you need a migration done cleanly the first time.
Schedule your import consultation today and discover how professional content migration expertise can accelerate your Webflow project while ensuring zero content loss and preserved SEO performance.
Webflow only accepts CSV (Comma-Separated Values) files for CMS imports. You can create or export this format easily from Excel, Google Sheets, Notion, or any CMS platform that supports CSV export.
Yes, you can. To import images, include a column in your CSV with direct image URLs (ending in .jpg, .png, or .gif). Webflow will automatically fetch and upload these images into your project when the import is processed.
Yes, you can export your WordPress posts or pages as a CSV file, then map that data into Webflow CMS Collections. Tools like Udesly, WhaleSync, or Migrate to Webflow plugins simplify the migration process.
Import time depends on the size of your CSV and the number of images. Small imports complete in seconds, while larger ones with hundreds of items and images may take several minutes to process.
If you make a mistake, you can manually delete imported items from the CMS Collection. However, Webflow doesn’t offer an undo import option, so it’s recommended to back up your project before performing large imports.
Yes, but not in one CSV. The CSV importer is capped at 10,000 rows per upload. For larger collections, split your CSV into multiple files and import sequentially, or use the Webflow CMS API which has no per-request item cap (just rate limits).
Not natively through the CSV importer — that's a one-time operation. For recurring or scheduled imports (e.g., syncing a product feed daily), use the Webflow CMS API with a scheduled job, or a third-party tool like Whalesync that handles incremental sync automatically.
Partially. Webflow's CSV importer imports content into the primary locale only. Translated field values for secondary locales cannot be bulk-imported via CSV they must be added via the Webflow CMS API using locale-specific PATCH requests, or managed manually through the Webflow Editor's locale switcher. For ongoing multi-locale content management, Whalesync supports multi-locale syncing from Airtable or Google Sheets, with each locale mapped to a separate column in the source sheet.


Sanket Vaghani has 8+ years of experience building designs and websites. He is passionate about building user centric designs and Webflow. He build amazing Webflow websites and designs for brands.
A Webflow Premium Partner is an agency at the top tier of Webflow's official partner program.

Learn how to build a high-impact B2B SaaS SEO strategy that attracts qualified leads, boosts rankings, and drives consistent revenue. Step-by-step framework with real growth tactics

Programmatic SEO on Webflow means generating many landing pages from one CMS Collection template one page per.
Quick Turnaround. No Contracts. Cancel Anytime. Book a 30 minutes consulting call with our expert.